Deutsch
 EN
EN Español
 Français
 Italiano
 Português
Have you ever received an email from a website you visited that was tailored exactly according to your browsing behavior or interests on that site? This is usually the result of marketing automation — software that automatically performs marketing tasks based on certain triggers or conditions.
Although it sounds complicated, marketing automation is very easy to setup and use.
Why use marketing automation on your WordPress site?
There are two main areas in which marketing automation can provide enormous benefits:
- Reaching customers with a hyper-targeted marketing message at exactly the right time.
- Improving email marketing campaign performance through the creation of dynamically segmented lists based on marketing automation triggers.
- Updating customer attributes in your database, such as a lead score, based on certain behavior.
By tracking the on-site behavior of your contacts, marketing automation lets you set up workflows that automate tasks around triggers and conditional logic. This can save you a ton of time and work.
There are a number of different marketing automation tools out there, but few tools make adding automation tracking in WordPress as easy as Sendinblue. Let’s take a closer look at how you can get it up and running in less than 10 minutes (really!).
How to set up Sendinblue marketing automation account and activate it in WordPress
Starting from your WordPress dashboard, you will need to install the Sendinblue plugin for WordPress. You can also find it by searching “sendinblue” in the “Add New Plugins” screen in the dashboard.

Once you add the WordPress plugin, go to Sendinblue >> Home and you will be at the login screen for the plugin. Here, you will be prompted to login via the API key, or create an account (if you don’t already have one).
For the sake of completeness, we will cover how to create a new account as well.
Once you click on the Create Account button, you will be directed to the Sendinblue website.
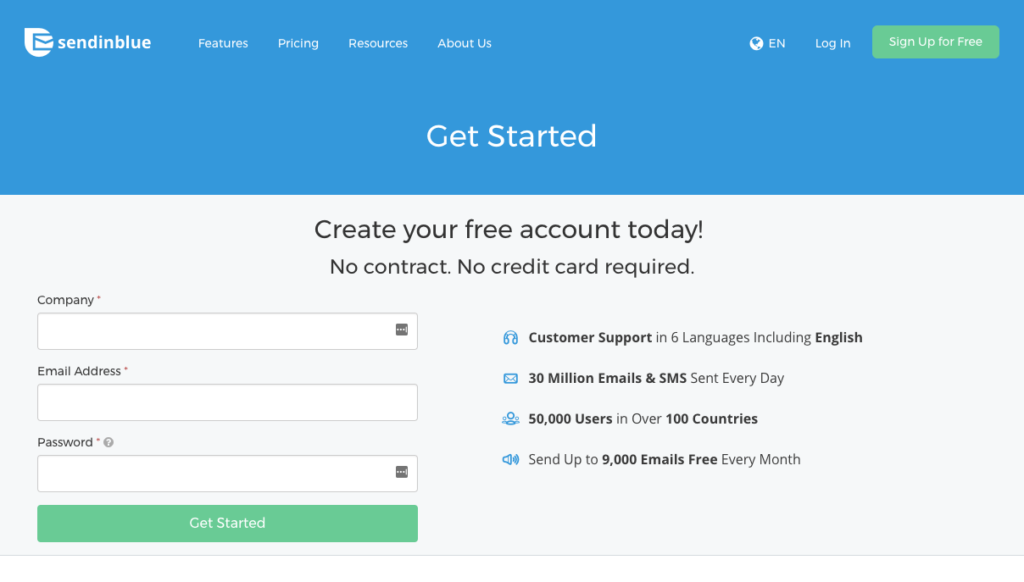
Enter your company name, email address, and password, you will be sent a confirmation email. Once you confirm your email address, you’ll be taken back to Sendinblue to complete the rest of your profile.

After completing your profile, enable marketing automation by clicking on the “Automation” tab on the main navigation at the top. Here, you can turn on automation by clicking the “Try Automation” button.

Once you’ve enabled marketing automation, you just need your API key so that you can log into the WordPress plugin. This can be found by clicking on “Campaigns’ and then accessing the “API & Forms” tab on the left-hand side menu.
From the API & Forms menu, click on the Manage API Keys.
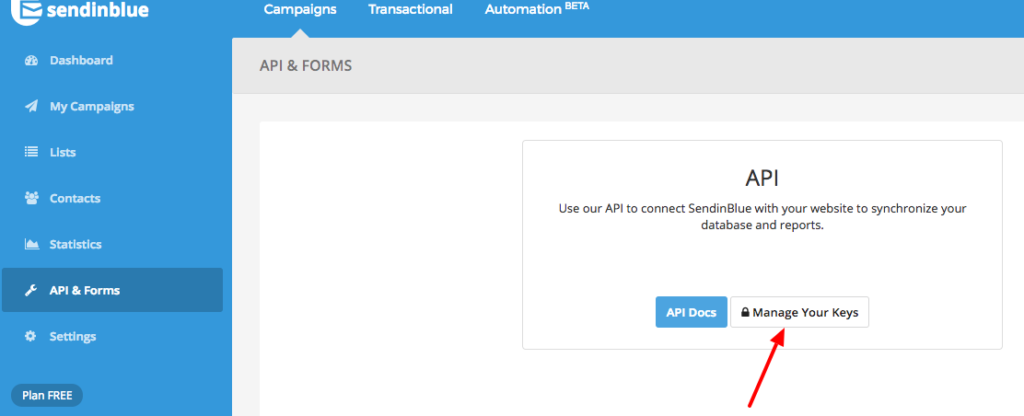
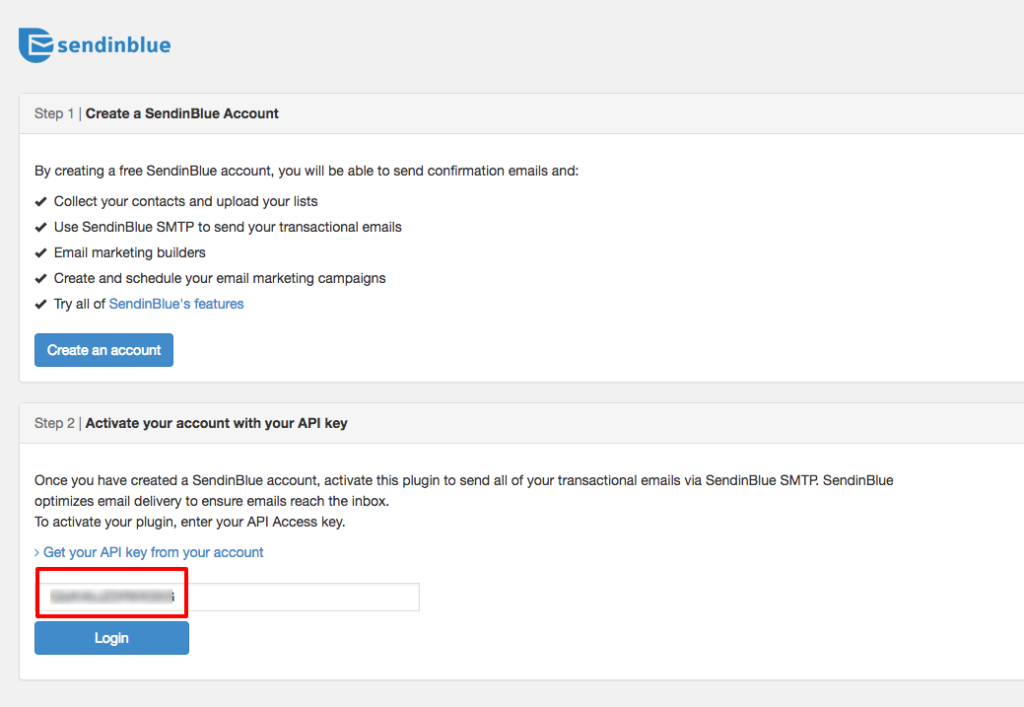
This will take you to screen with your API key, which you will use to connect your Sendinblue account to your WordPress site.

Copy this key and go back to your WP dashboard. From here, navigate to the Sendinblue plugin home screen to login to your account.
Paste your API key into the form field and click Login.
Once you are logged in, there is just one more step.
Scroll to the bottom of the box that asks if you want to activate marketing automation. Click Yes and then Activate.
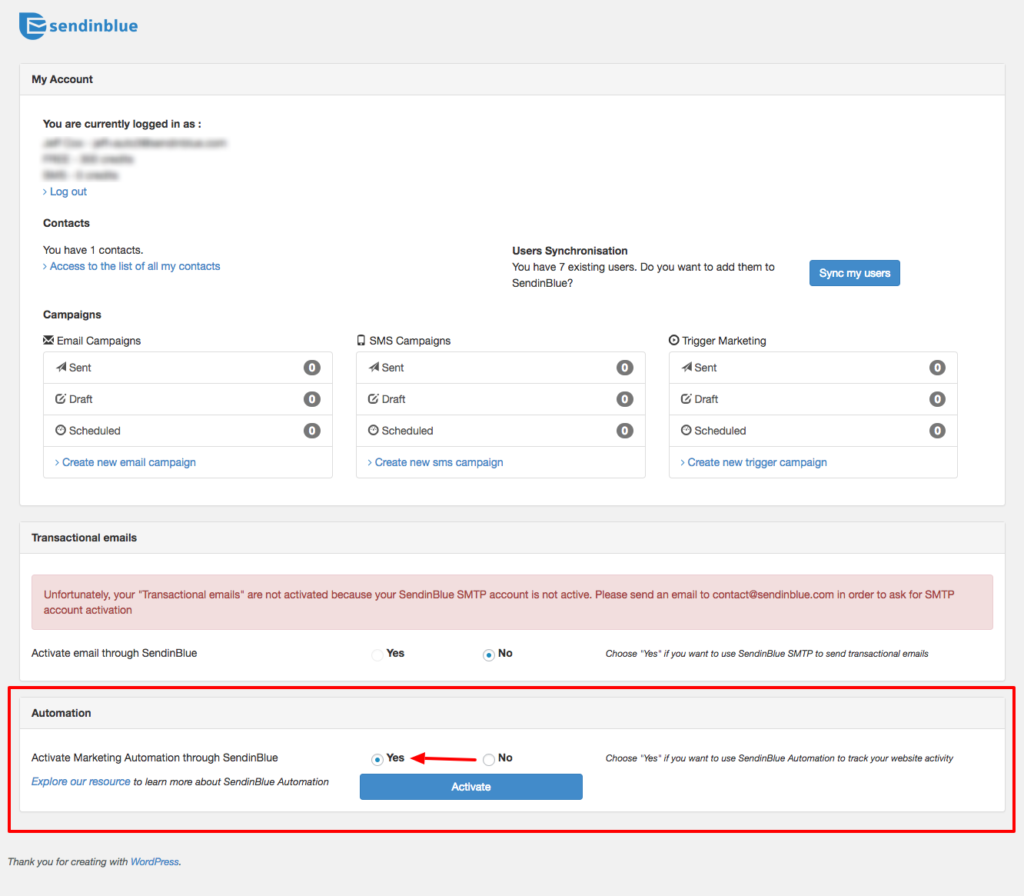
After clicking Activate, you should receive a confirmation message that lets you know that the tracking code has been installed successfully.
Finally, if you see a red error message in the “Transactional emails” section like the screenshot above, make sure that you send an email to the Sendinblue support team and request the activation of your SMTP (transaction email) account. Without your SMTP service activated, you won’t be able to send emails through marketing automation.
And that’s it!
You now have marketing automation installed on your WordPress site. Now it’s time to create your first marketing automation workflow.
Setting up your first workflow
With Sendinblue marketing automation, you can choose from a number of “pre-made” automation workflow templates. These templates consist of the most common workflows and are designed to make setup a breeze so you can start getting the benefits of automation ASAP.
In addition to the pre-made workflow templates, you can also create a custom workflow to have more control over the conditions and actions of your marketing automation workflow.

One of the most common (and effective) workflows is creating a series of welcome emails that are sent to new subscribers or customers when they join your list of contacts. We will use this as an example to show you how to quickly set up your first workflow.
First, login to your Sendinblue account and navigate yourself to the “Automation” tab.
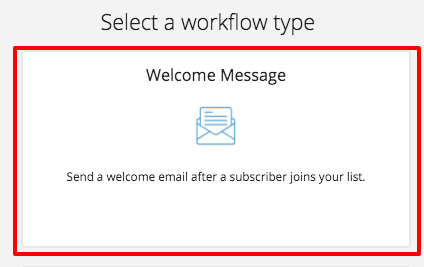
From there, you should select the “Create a New Workflow” button. This will give you the series of template options (pictured above) from which to choose. Once you’re here, select the “Welcome Message” template to get started.
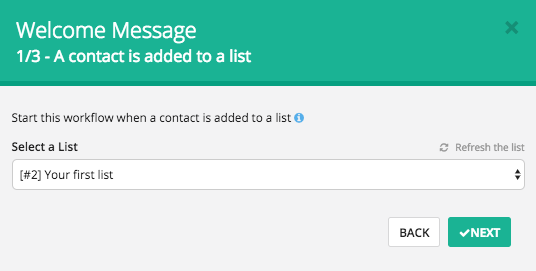
After selecting the template, you will have to choose the starting point for the workflow. In this case you have to select a list that will signal the start of the welcome series. By selecting a list, you are telling the software that a contact should enter the workflow as soon as they are added to this specific list of contacts.
For simplicity’s sake — let’s just say the starting point is when a contact is added to the main list of contacts (you can get more granular later on).
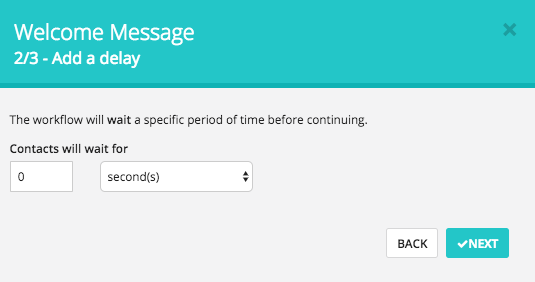
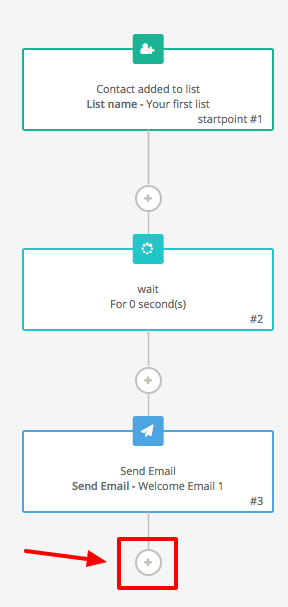
Now that you have a starting point, you will be asked to choose how long you want to wait before sending the email. You can choose any number of seconds, minutes, hours, days, weeks, or even months (though that might defeat the purpose of a welcome email).
If you want it to be sent immediately, just put 0 seconds.
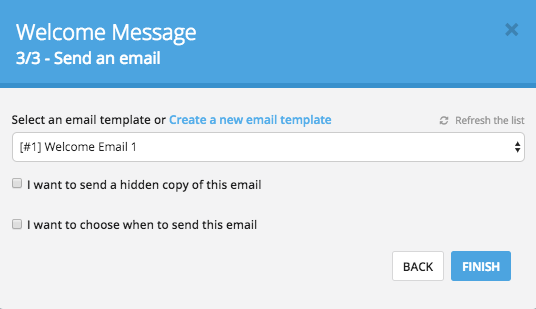
The last step after designating your wait time is to select which email template you want to send as your welcome message.
If you haven’t already created an SMTP email template, you can do so by clicking on the “Create a new email template” link. This will take you to the Sendinblue responsive design email builder, where you can use drag and drop interface to create responsive and professional looking email templates.
You also have the option to create templates using HTML in the HTML text editor.
Once you have a template created, you can go back to the workflow setup menu and choose your newly created template by name.
After selecting your template, click “Finish,” and you are done setting up your welcome email!
If you would like to add more emails or other actions to the workflow, you can do so by simply clicking the plus sign at the bottom of the workflow.
Now that you know the basics of how to set up marketing automation for your site and create workflows, you can get even more creative and think about the best ways to improve communications with your contacts.
Further reading:
If you’re interested in learning more about marketing automation, take a look at these articles.
If you want more content like this, subscribe to our newsletter or follow us on Twitter!