Deutsch
 EN
EN Español
 Français
 Italiano
 Português
WordPress emails going to spam? WordPress contact form not working? These all too common issues can be easily fixed by switching to a dedicated SMTP provider. In this article learn how to successfully send email from WordPress with Sendinblue’s free SMTP plugin.
WordPress as a CMS comes with it’s own built-in email function. Which means sending email from WordPress should be a walk in the park, right? Well…not always.
More often than not, emails sent through WordPress experience delivery issues. This can lead to lost business opportunities and frustrated customers.
The good news is that there’s a much more reliable way to deliver WordPress emails. And as you’re about to discover, it’s incredibly easy to set up (no coding required).
This guide will help you understand:
- Why the issue of WordPress not sending emails arises
- The role of a dedicated SMTP provider and why you need one for WordPress
- How to set up and ensure the delivery of WordPress emails with Sendinblue SMTP
Table of Contents
How does WordPress send email?
Out of the box, WordPress uses the wp_mail() function to send emails over your web host’s servers. This default setting pushes email notifications to the website owner and other WordPress users.
Examples of emails sent by a WordPress site include:
- Contact form messages
- Password resets and other user notifications
- System and plugin updates
- Order confirmations and shipping notifications (if you’re running an ecommerce site, for example)
Time-sensitive messages like these are what’s known as transactional emails. Not to be confused with email marketing campaigns or newsletters (these require separate email marketing software).
Now let’s understand why it’s not a good idea for your business to rely on these default WordPress email settings.
Why is WordPress email not working?
If you’ve noticed WordPress not sending emails or the contact form not working, there are a number of possible reasons for this.
Firstly, it could be because the web host server isn’t configured to use the WP mail() function. To fix this, you’ll need to contact your hosting provider directly. But even then, there’s no guarantee your emails will make it to the inbox.
Why? Because ISPs treat emails sent via PHP as suspicious (PHP is the programming language upon which WordPress is built). Spammers often use web host servers to send unsollicited bulk email.
This harms deliverability rates for others on the same server. The result is WordPress emails going to spam or not getting delivered at all. In the worst case scenario, your domain name could end up blacklisted by certain ISPs.
WordPress email not working can mean missing out on potential business opportunities and damaging your brand reputation.
All this can be avoided, however, once you start using a dedicated SMTP service.
What is an SMTP service?
In short, an SMTP service provides its clients with access to dedicated servers over which they can send and receive emails.
There are two types of SMTP server.
- SMTP servers for sending personal emails. These typically belong to webmail providers like Gmail and Internet Service Providers (ISPs).
- SMTP relay servers for sending transactional emails and campaigns to large numbers of recipients. Sendinblue is one such company offering this type of service.
The latter is the one we’re most interested in for sending WordPress emails.
Why it’s better to use SMTP to send email from WordPress
Professional SMTP relay services like Sendinblue are designed to ensure the best possible email deliverability, i.e. landing your emails in the inbox.
Switching your WordPress SMTP settings over to one of these will drastically reduce the amount of WordPress email going to spam.
Delivering to the inbox in real time is crucial if you’re running a membership site that requires password reset emails and account notifications. Same goes if you’re using an ecommerce plugin and need to get order confirmations out to customers.
Why choose Sendinblue as your SMTP provider
Sendinblue has dedicated infrastructure and a team of deliverability experts working round the clock to ensure users’ emails reach the inbox.
We also have a rigorous validation process to keep spammers out and protect the sender reputation of users on our shared IPs.
Not only will you have a better chance at inbox placement, you’ll also be able to monitor performance statistics like delivery, open, and click rates.
Our free SMTP server offers a generous 300 free emails a day which is usually plenty for a small business or blogger to send email from WordPress.
And if, down the line, you want to start a WordPress newsletter, Sendinblue handles marketing emails as well. No need to seek out a separate service.
How to set up email on WordPress site using Sendinblue’s SMTP plugin
The easiest way for non-technical folks to configure WordPress email settings is with a plugin.
There are plenty of SMTP plugins available, WP Mail SMTP being one of the most popular.
Sendinblue has a custom-developed WordPress SMTP plugin that lets you override the wp_mail() function to automatically use Sendinblue SMTP.
To fix the issue of WordPress not sending email, here’s how you need to set up your Sendinblue account and configure the plugin.
1. Create a free Sendinblue account
Click the link below to open your free Sendinblue account. It’s quick and easy, no credit card required.
You’ll be asked to verify your email address and provide some basic information about your business. Then you’ll be invited to choose a plan.
Your choice of plan depends on the volume of WordPress emails you need to send. As already mentioned, the free plan offers 300 emails a day.
💡 Good to know: All new Sendinblue users go through an account validation process which is mostly automatic. Chances are you won’t even notice it. However, some accounts need to undergo manual validation. Don’t worry though, the process will be completed within 24 hours (and usually much faster than that).
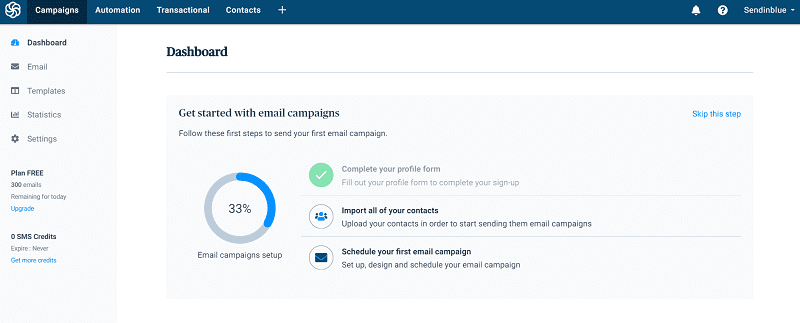
Once your account’s created and the profile information added, you’ll arrive on the Sendinblue dashboard.
Welcome aboard! 👋 Next we’re going to implement two best practices to help WordPress sending emails.
2. Verify your domain on Sendinblue
The next thing you need to do, an important step for your future email deliverability, is verify your domain on Sendinblue.
This way you’ll be able to electronically sign emails with your domain name (highly recommended).
In email terms we refer to this as the DKIM signature.
DKIM (DomainKeys Identified Mail) is an email security protocol that proves to ISPs you’re a trusted sender. Authenticating your top-level/apex domain with Sendinblue will help prevent emails landing in the spam folder.
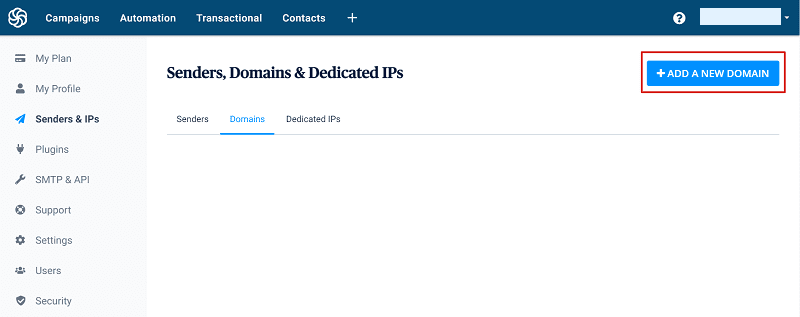
Open the settings menu in the top right corner and select ‘Senders & IPs‘.
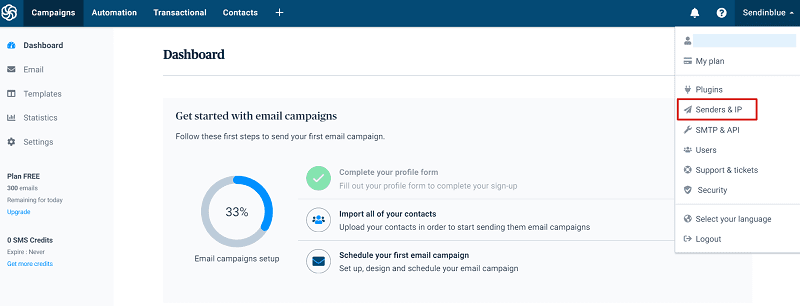
Go to ‘Domains’ and click ‘Add a new domain‘.
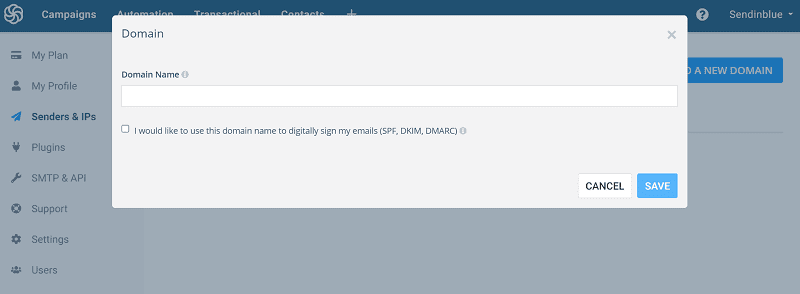
A pop-up will appear. Enter your domain name in the format exampledomain.com without the https:// or www.
Tick the box ‘I would like to use this domain name to sign my emails‘ and then hit ‘Save‘.
Once saved, a new window will appear with a number of TXT files. These need to be added to the DNS records on the cPanel of your web hosting account.
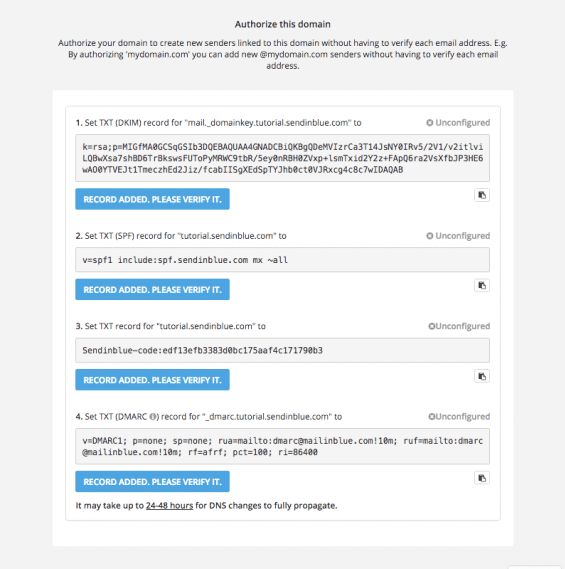
Popular web hosts include GoDaddy, Bluehost, OVH, Namecheap, and Siteground.
In a separate browser window, log into your hosting account and find where to add TXT records. The process varies among hosting providers but here you’ll find information for the most common ones:
Once you’ve uploaded the TXT records to the DNS, go back to Sendinblue and check if they’ve been configured by clicking ‘Record Added. Please verify it.’
A verified TXT record will display the text ‘Configured‘ in green.
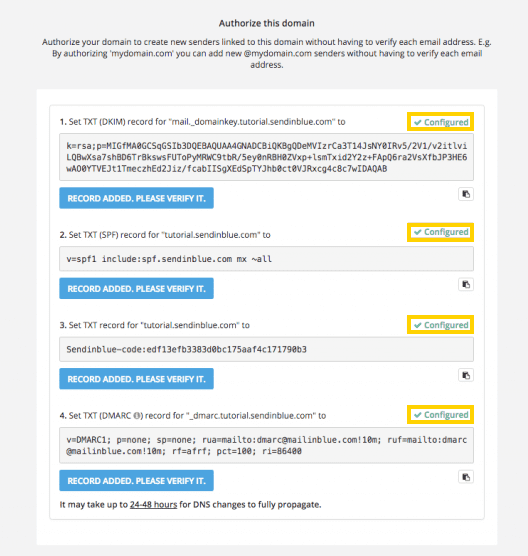
❗ If nothing happens, don’t worry. DNS changes can take 24-48 hours to fully propagate. You’ll just need to check again later.
3. Add email sender information
The next step in customizing your email signature is to add your Sender information. This refers to the From Name and From Email that’ll appear in an email recipient’s inbox.
Don’t skip this step—sender name plays an important role in whether your email gets opened or not.
Your email sender name should be easily recognized to instill reader confidence.
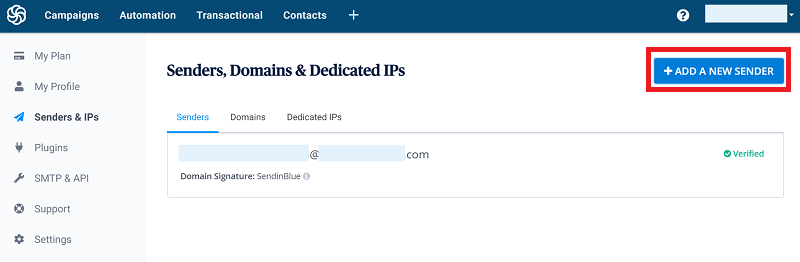
Under ‘Senders & IPs‘, select ‘Senders’.
Here you’ll see the email address used to create your Sendinblue account. This can’t be deleted but you can, of course, add multiple custom addresses associated with your domain.
Select ‘Add a new sender‘.
Insert the From Name and From Email, then hit ‘Save‘.
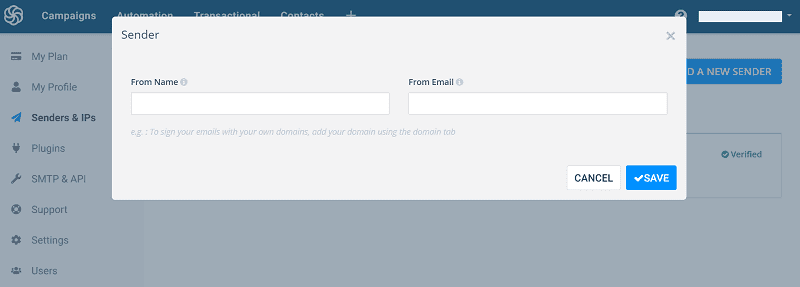
You’ll receive a verification email at this address you just added.
And with that, your DKIM signature will be fully set up. This will help avoid the problem of WordPress emails going to spam. 🎉
Now let’s head over to WordPress and install the Sendinblue SMTP plugin.
4. Download the Sendinblue SMTP plugin on WordPress
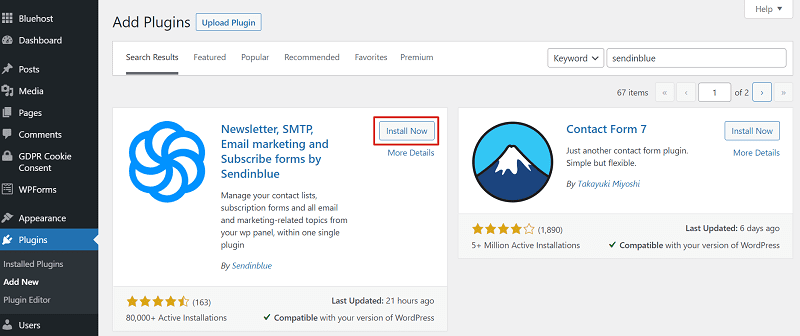
Log into your WordPress admin dashboard. Go to ‘Plugins‘, ‘Add New‘, then search for Sendinblue in the plugin directory. The first option to appear will be ‘Newsletter, SMTP, Email marketing and Subscribe forms by Sendinblue‘.
Install and activate the plugin.
To configure the settings to send WordPress email with Sendinblue SMTP, select ‘Sendinblue‘ on the WordPress dashboard.
On the welcome page there are two options for connecting the plugin to your Sendinblue account.
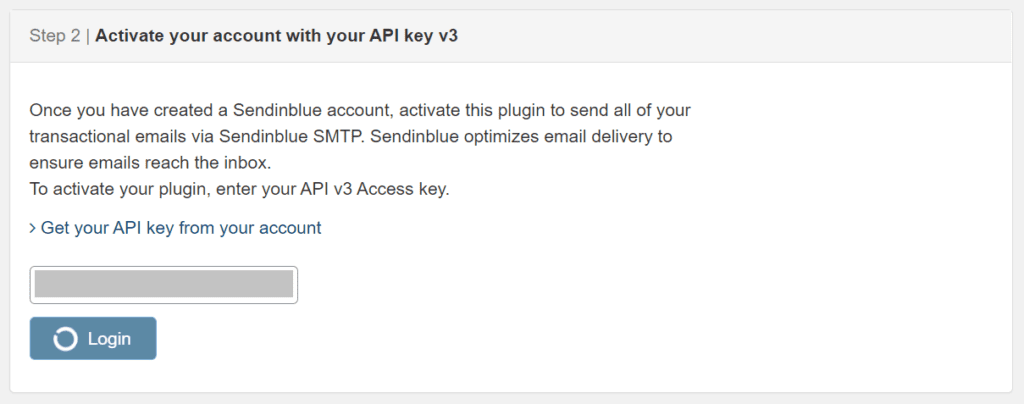
As you’ve already created a Sendinblue account, you’ll take the Step 2 option. This requires entering an API key.
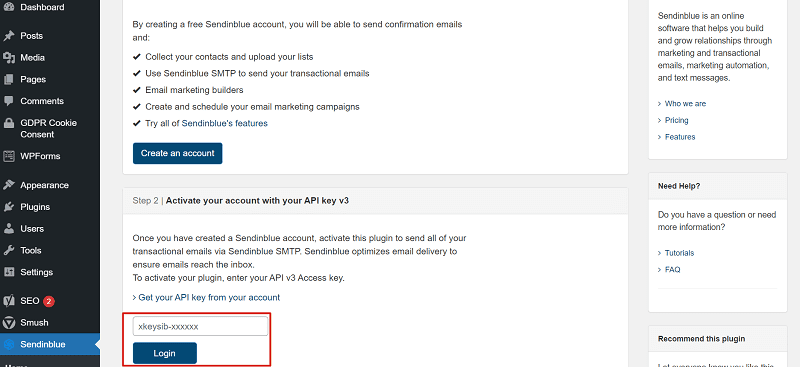
To find your API key, go back to the Sendinblue dashboard and select SMTP & API from the main menu on the left.
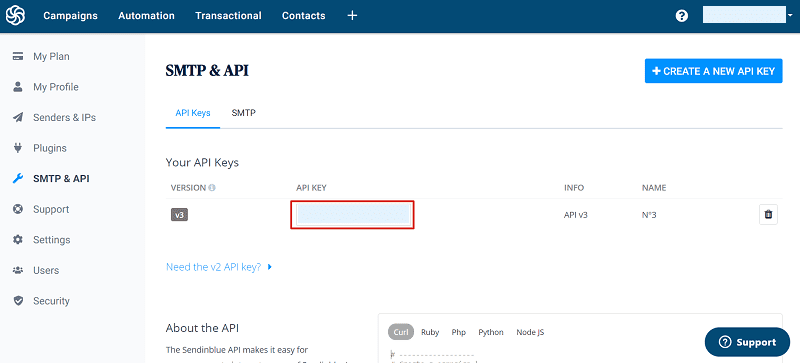
Copy and paste the API key into the entry field and hit ‘Login‘.
On the next page you’ll be presented with options for additional settings.
Under transactional emails, select ‘Yes‘ to send WordPress email over Sendinblue SMTP. This will override the default wp_mail() function to automatically use Sendinblue.
5. Send a test email
Almost there!
Finally, send a test email to make sure everything’s working properly.
For example, submit a new request via your website contact form. The email should arrive promptly at the destination mailbox as configured in your contact form settings.
Start sending WordPress emails with Sendinblue SMTP
And that’s it. Now you know what it takes to solve the issue of WordPress emails not sending.
Once you start sending over Sendinblue SMTP, your WordPress email notifications should reach the inbox without delay.
But it doesn’t end there for the Sendinblue WordPress email plugin. You can use it do a bunch of other stuff, including:
- Grow an email list with custom subscription forms that can be embedded into posts, pages or sidebars
- Manage and segment contact lists
- Create eye-catching emails with Sendinblue’s Drag & Drop email builder
- Activate marketing automation workflows or access existing workflows in Sendinblue
- Get detailed statistics on email campaign performance
Play around with the plugin to explore all the marketing possibilities.
Hope you found this guide useful. Catch us on Twitter for the latest Sendinblue news and updates.